pygmt.Figure.text
- Figure.text(textfiles=None, x=None, y=None, position=None, text=None, angle=None, font=None, justify=None, *, region=None, projection=None, frame=None, clearance=None, offset=None, fill=None, no_clip=None, verbose=None, pen=None, xshift=None, yshift=None, panel=None, coltypes=None, perspective=None, transparency=None, **kwargs)
Plot or typeset text strings of variable size, font type, and orientation.
Must provide at least one of the following combinations as input:
textfilesx/y, andtextpositionandtext
Full parameter list at https://docs.generic-mapping-tools.org/latest/text.html
Aliases:
B = frame
C = clearance
D = offset
G = fill
J = projection
N = no_clip
R = region
V = verbose
W = pen
X = xshift
Y = yshift
c = panel
f = coltypes
p = perspective
t = transparency
- Parameters
textfiles (str or list) – A text data file name, or a list of filenames containing 1 or more records with (x, y[, angle, font, justify], text).
x/y (float or 1d arrays) – The x and y coordinates, or an array of x and y coordinates to plot the text
position (str) –
Sets reference point on the map for the text by using x,y coordinates extracted from
regioninstead of providing them throughx/y. Specify with a two letter (order independent) code, chosen from:Horizontal: L(eft), C(entre), R(ight)
Vertical: T(op), M(iddle), B(ottom)
For example,
position="TL"plots the text at the Upper Left corner of the map.text (str or 1d array) – The text string, or an array of strings to plot on the figure
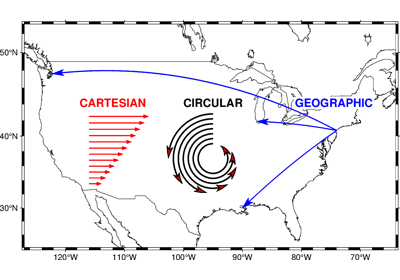
angle (int, float, str or bool) – Set the angle measured in degrees counter-clockwise from horizontal (e.g. 30 sets the text at 30 degrees). If no angle is explicitly given (i.e.
angle=True) then the input totextfilesmust have this as a column.font (str or bool) – Set the font specification with format size,font,color where size is text size in points, font is the font to use, and color sets the font color. For example,
font="12p,Helvetica-Bold,red"selects a 12p, red, Helvetica-Bold font. If no font info is explicitly given (i.e.font=True), then the input totextfilesmust have this information in one of its columns.justify (str or bool) – Set the alignment which refers to the part of the text string that will be mapped onto the (x,y) point. Choose a 2 character combination of L, C, R (for left, center, or right) and T, M, B for top, middle, or bottom. E.g., BL for lower left. If no justification is explicitly given (i.e.
justify=True), then the input totextfilesmust have this as a column.projection (str) – Required if this is the first plot command. projcode[projparams/]width. Select map projection.
region (str or list) – Required if this is the first plot command. xmin/xmax/ymin/ymax[+r][+uunit]. Specify the region of interest.
clearance (str) – [dx/dy][+to|O|c|C]. Adjust the clearance between the text and the surrounding box [Default is 15% of the font size]. Only used if
penorfillare specified. Append the unit you want (c for cm, i for inch, or p for point; if not given we consult PROJ_LENGTH_UNIT) or % for a percentage of the font size. Optionally, use modifier +t to set the shape of the textbox when usingfilland/orpen. Append lower case o to get a straight rectangle [Default is o]. Append upper case O to get a rounded rectangle. In paragraph mode (paragraph) you can also append lower case c to get a concave rectangle or append upper case C to get a convex rectangle.fill (str) – Sets the shade or color used for filling the text box [Default is no fill].
offset (str) – [j|J]dx[/dy][+v[pen]]. Offsets the text from the projected (x,y) point by dx,dy [0/0]. If dy is not specified then it is set equal to dx. Use j to offset the text away from the point instead (i.e., the text justification will determine the direction of the shift). Using J will shorten diagonal offsets at corners by sqrt(2). Optionally, append +v which will draw a line from the original point to the shifted point; append a pen to change the attributes for this line.
pen (str) – Sets the pen used to draw a rectangle around the text string (see
clearance) [Default is width = default, color = black, style = solid].no_clip (bool) – Do NOT clip text at map boundaries [Default is will clip].
Select verbosity level [Default is w], which modulates the messages written to stderr. Choose among 7 levels of verbosity:
q - Quiet, not even fatal error messages are produced
e - Error messages only
w - Warnings [Default]
t - Timings (report runtimes for time-intensive algorithms);
i - Informational messages (same as
verbose=True)c - Compatibility warnings
d - Debugging messages
xshift (str) – [a|c|f|r][xshift]. Shift plot origin in x-direction.
yshift (str) – [a|c|f|r][yshift]. Shift plot origin in y-direction. Full documentation is at https://docs.generic-mapping-tools.org/latest/gmt.html#xy-full.
panel (bool or int or list) – [row,col|index]. Select a specific subplot panel. Only allowed when in subplot mode. Use
panel=Trueto advance to the next panel in the selected order. Instead of row,col you may also give a scalar value index which depends on the order you set viaautolabelwhen the subplot was defined. Note: row, col, and index all start at 0.coltypes (str) – [i|o]colinfo. Specify data types of input and/or output columns (time or geographical data). Full documentation is at https://docs.generic-mapping-tools.org/latest/gmt.html#f-full.
perspective (list or str) – [x|y|z]azim[/elev[/zlevel]][+wlon0/lat0[/z0]][+vx0/y0]. Select perspective view and set the azimuth and elevation angle of the viewpoint. Default is [180, 90]. Full documentation is at https://docs.generic-mapping-tools.org/latest/gmt.html#perspective-full.
transparency (int or float) – Set transparency level, in [0-100] percent range. Default is 0, i.e., opaque. Only visible when PDF or raster format output is selected. Only the PNG format selection adds a transparency layer in the image (for further processing). transparency can also be a 1d array to set varying transparency for texts, but this option is only valid if using x/y/text.